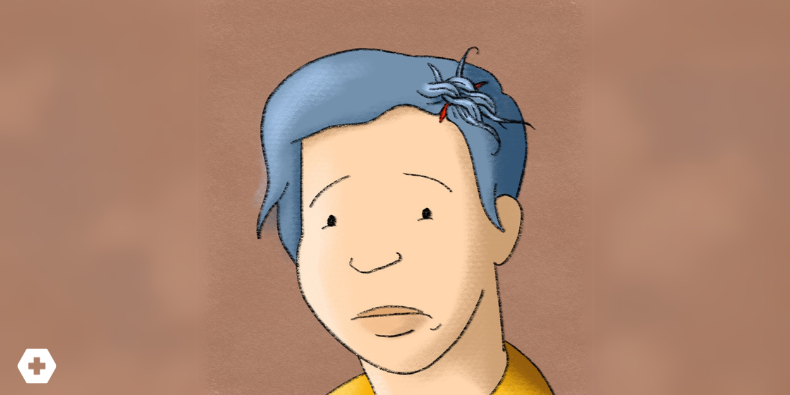
The Hair Apposition Technique: a pain-free, tear-free approach to scalp lacerations!

It’s 10 minutes until the end of your shift and you’re finishing up your last note for the day…or so you think. Right on cue, in walks a frantic parent with a crying child and a scalp full of bloody, matted hair.
Scalp lacerations are painful, messy, and tricky to tackle with suture strings getting lost amongst a sea of hair.
But what if there was a quicker, easier, pain free way to get those scalp wounds closed that didn’t involve sutures or staples?
Meet Your New Best Friend: The Hair Apposition Technique
The Hair Apposition Technique (HAT) uses the patient’s own hair to close small scalp lacerations. No needles, no sutures, no staples. Just twist, glue, and go.
When to Use the Hair Apposition Technique
- Small, superficial scalp lacerations: works best for lacerations only a few cm in length and with no involvement of deeper layers like muscle or fascia.
- Clean, linear wounds: Wounds that align naturally without significant tension.
- Pediatric patients! I think the reasoning here is obvious.
How to Perform the Hair Apposition Technique
- Irrigate and examine the wound: Begin by thoroughly irrigating the scalp laceration. Carefully assess the wound to ensure that the edges align naturally without significant tension.
- Twist hair on either side of the wound: Select 3-7 strands of hair from either side of the laceration. Twist these hair strands together to create a tight bundle that will help provide a strong closure.
- Interlock the hair bundles: Take the two twisted hair bundles and interlock them in a 360-degree revolution. As you twist the two bundles together, it will bring the wound edges closer. The intertwined hair will act as a natural "suture," securing the wound edges in place.
- Apply tissue adhesive: Once the hair bundles are interlocked, apply a small amount of tissue adhesive (e.g., Dermabond) to secure the hair bundles in place while the wound heals.
- Repeat if necessary: For longer lacerations, repeat the process along the entire length of the wound.
Aftercare for HAT Closures
The best part? No need to return for suture or staple removal! The hair will naturally unravel on its own within 7-10 days, and the wound will heal during this time.
- Avoid wetting the wound for 24-48 hours
- Monitor for infection
- Avoid tugging on the hair: The patient should avoid combing or brushing the hair near the wound to prevent dislodging the hair bundles.
When NOT to Use the Hair Apposition Technique
While the Hair Apposition Technique is an excellent method for many scalp lacerations, it is not suitable for all cases. It should be avoided in the following situations:
- Scalp lacerations longer than 10 cm.
- Grossly contaminated wounds: If the wound is heavily contaminated, HAT is not appropriate. Proper wound debridement and irrigation should be performed before considering more traditional closure techniques.
- Active and uncontrolled bleeding: If there is active bleeding that cannot be controlled, the wound should be closed using traditional closure techniques.
- Significant wound tension: HAT will not provide an adequate closure if the wound edges cannot be approximated without excessive tension.
No mess, no stress
The Hair Apposition Technique is a simple, effective, and patient-friendly alternative to traditional wound closure—especially for kids and anyone who (understandably) isn’t thrilled about getting stitches or staples.
So next time you’ve got a scalp lac with a whole lot of hair and not a lot of time, remember: twist, glue, and go.
To our short-haired patients: we’re sorry.
To our long-haired laceration patients? You’re welcome.
Practice-Changing Education
Experience education that goes beyond theory. Explore Hippo Education’s offerings below.


